Upstate New York Instant Garden

Trying to think of COVID friendly, fun, meditative, and healthy activity, look no further than creating your own Instant Garden. In just under 5 hours, our team (Rick, Emily, and myself), turned our drab front yard into a country oasis breeding new life to the front of our 1800s Hudson River home. Stemming from our COVID isolation we have made some welcomed improvements to our yard, thanks to phenomenal British garden shows on BritBox, various planting guides and magazines, and our passion and talent with landscaping and gardening. Using techniques from the Instant Gardner with Danny Clarke (our favorite garden show on BritBox) we brought our front yard back to life using clever design, imagination, recycled materials, and over 70 perennials. Check out the Before and After pictures of our front yard renovations (both the country garden the ocean inspired garden), plus a few pictures of the buying process!

Before

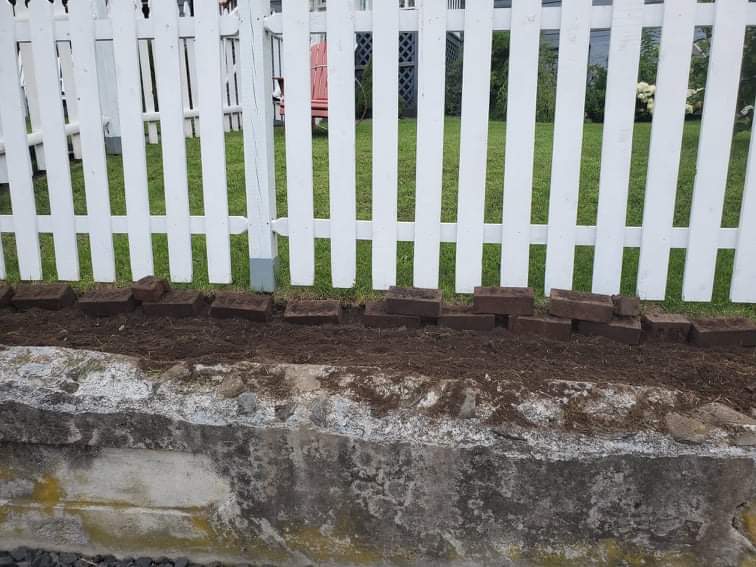
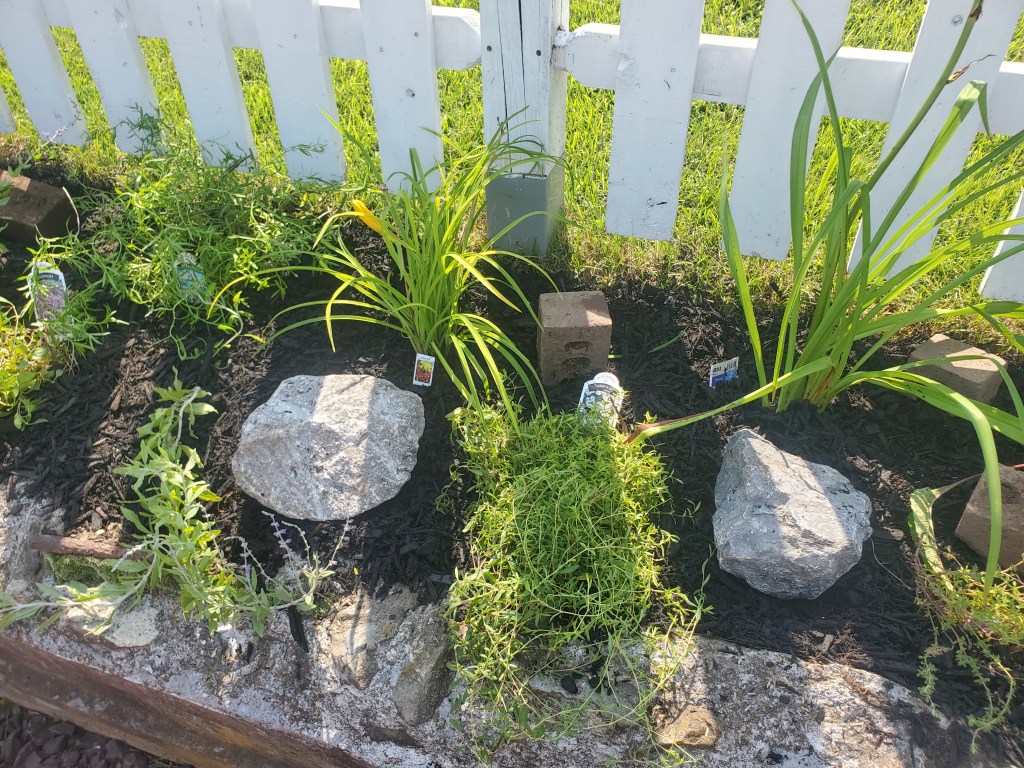
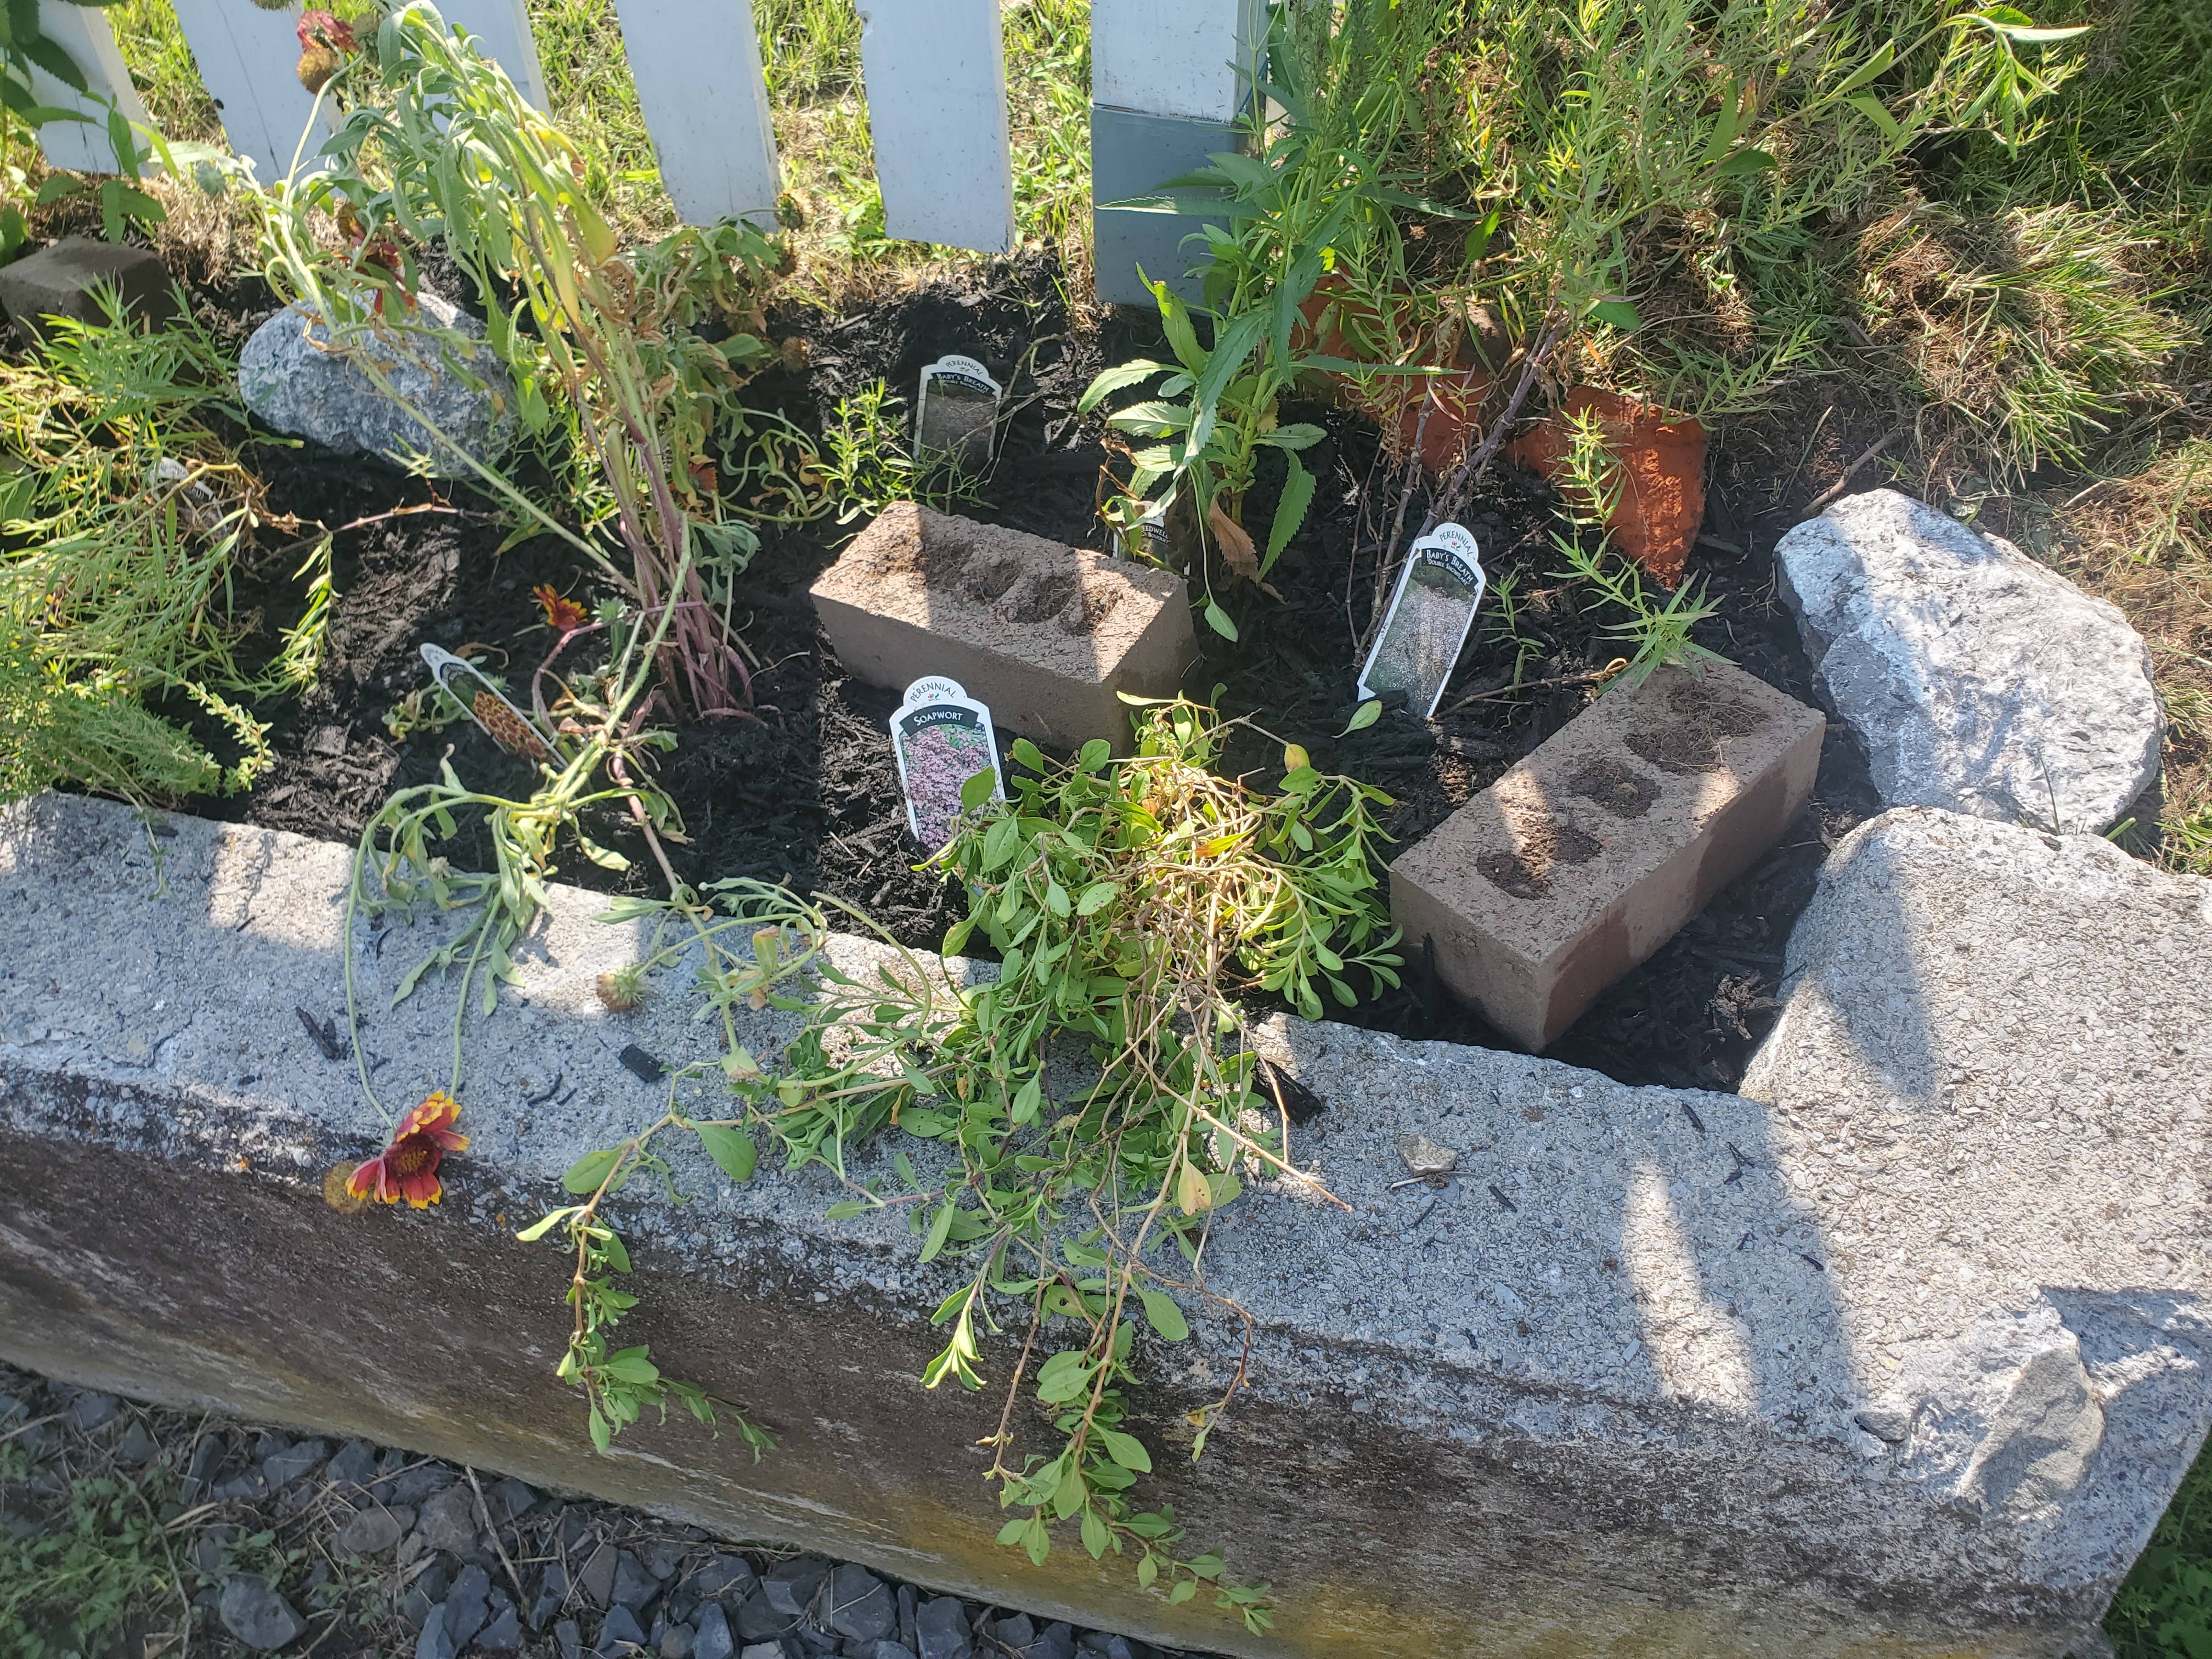
In reimagining our white picket fence addition, we decided to create a 28-ft country garden between the fence and the old foundation. After digging up the grass and tilling the soil, we removed over 40 antique bricks that must have been once part of the old foundation. From there, landscaping paper was laid. Plants were bought from Black Horse Farm and Lowes, both of which had huge markdowns on perennials since it is nearing the end of the season. When we returned, plants were laid out in a classic country garden feel, slices were cut in the landscaping paper, and holes were dug. We decided on black mulch to tie in the new shutters and mulched everything once the perennials were planted. Upon completion, some of the bricks and rocks were recycled as focal points in the new garden (the rest were saved for a later project). The new garden contains perennials like baby’s breadth, soapwart, primrose, yarrow, lupines, lilies, coneflowers, gayfeather, German satice, sea thrift, and much more. And there we have it – the perfect, tranquil front yard to emphasize our home, add curb appeal, and serve as a cutting garden perfect for flower arrangements and attracting pollinators.

After

As part of our Instant Garden Makeover, we also decided to tackle an unused eye sore between our two driveways. Although time and effort has gone into planting, mulching, and laying rocks in the past, we knew it was time for an upgrade (although we ran out of mulch) so the project will be completed at a later date.

Before

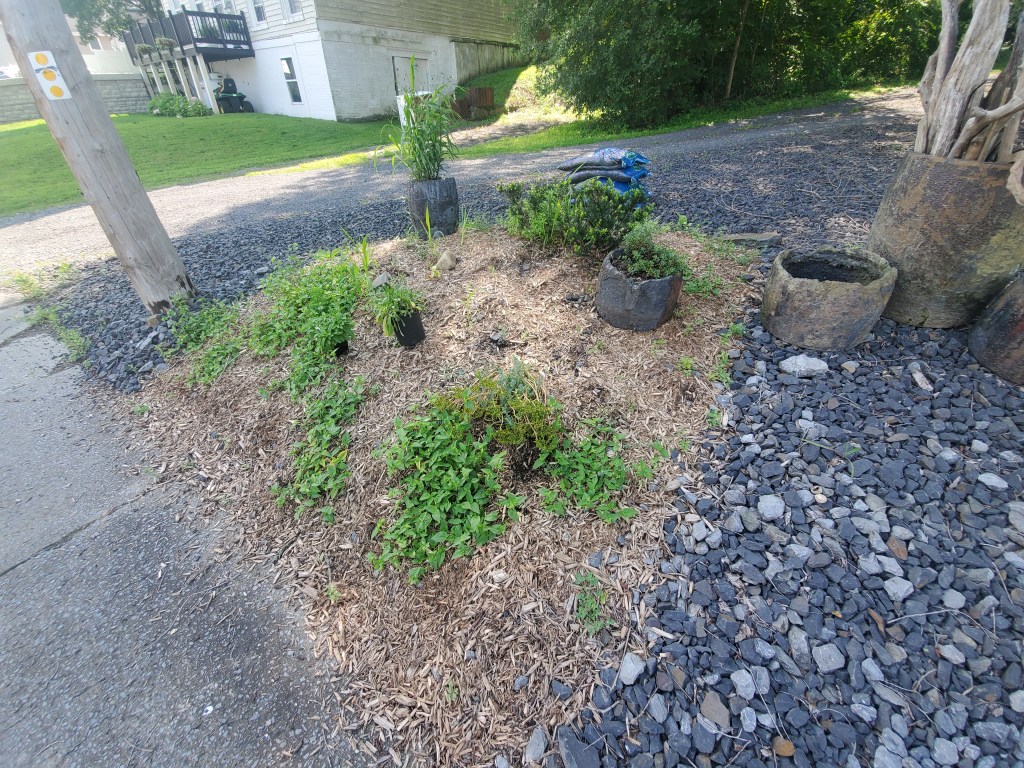
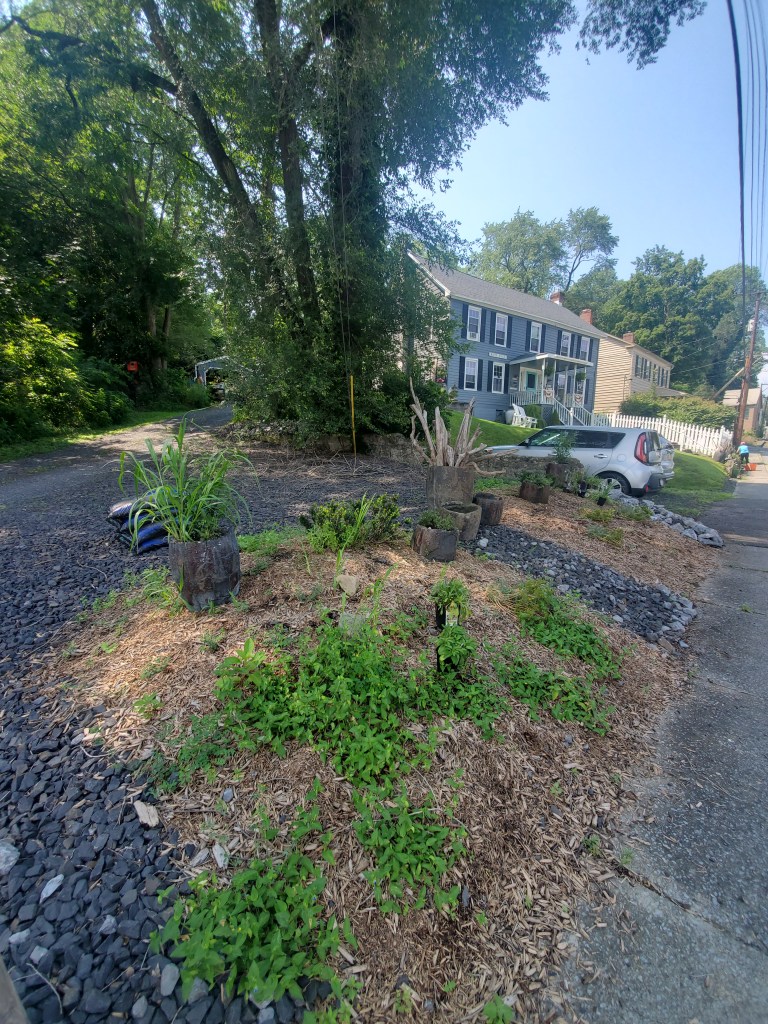
First, we began by pulling the various weeds that have built up over the past few wees. Since this area already had landscaping paper and cedar mulch, we laid out the perennials, which were inspired by the bright, wispy seaside plants along the sand dunes. We mulched the garden using the same black mulch to help tie that section of gardens to the house, but ran out so we had to thin the mulch out. Once we get a few more bags, we can lay the mulch thicker and finish up the project.
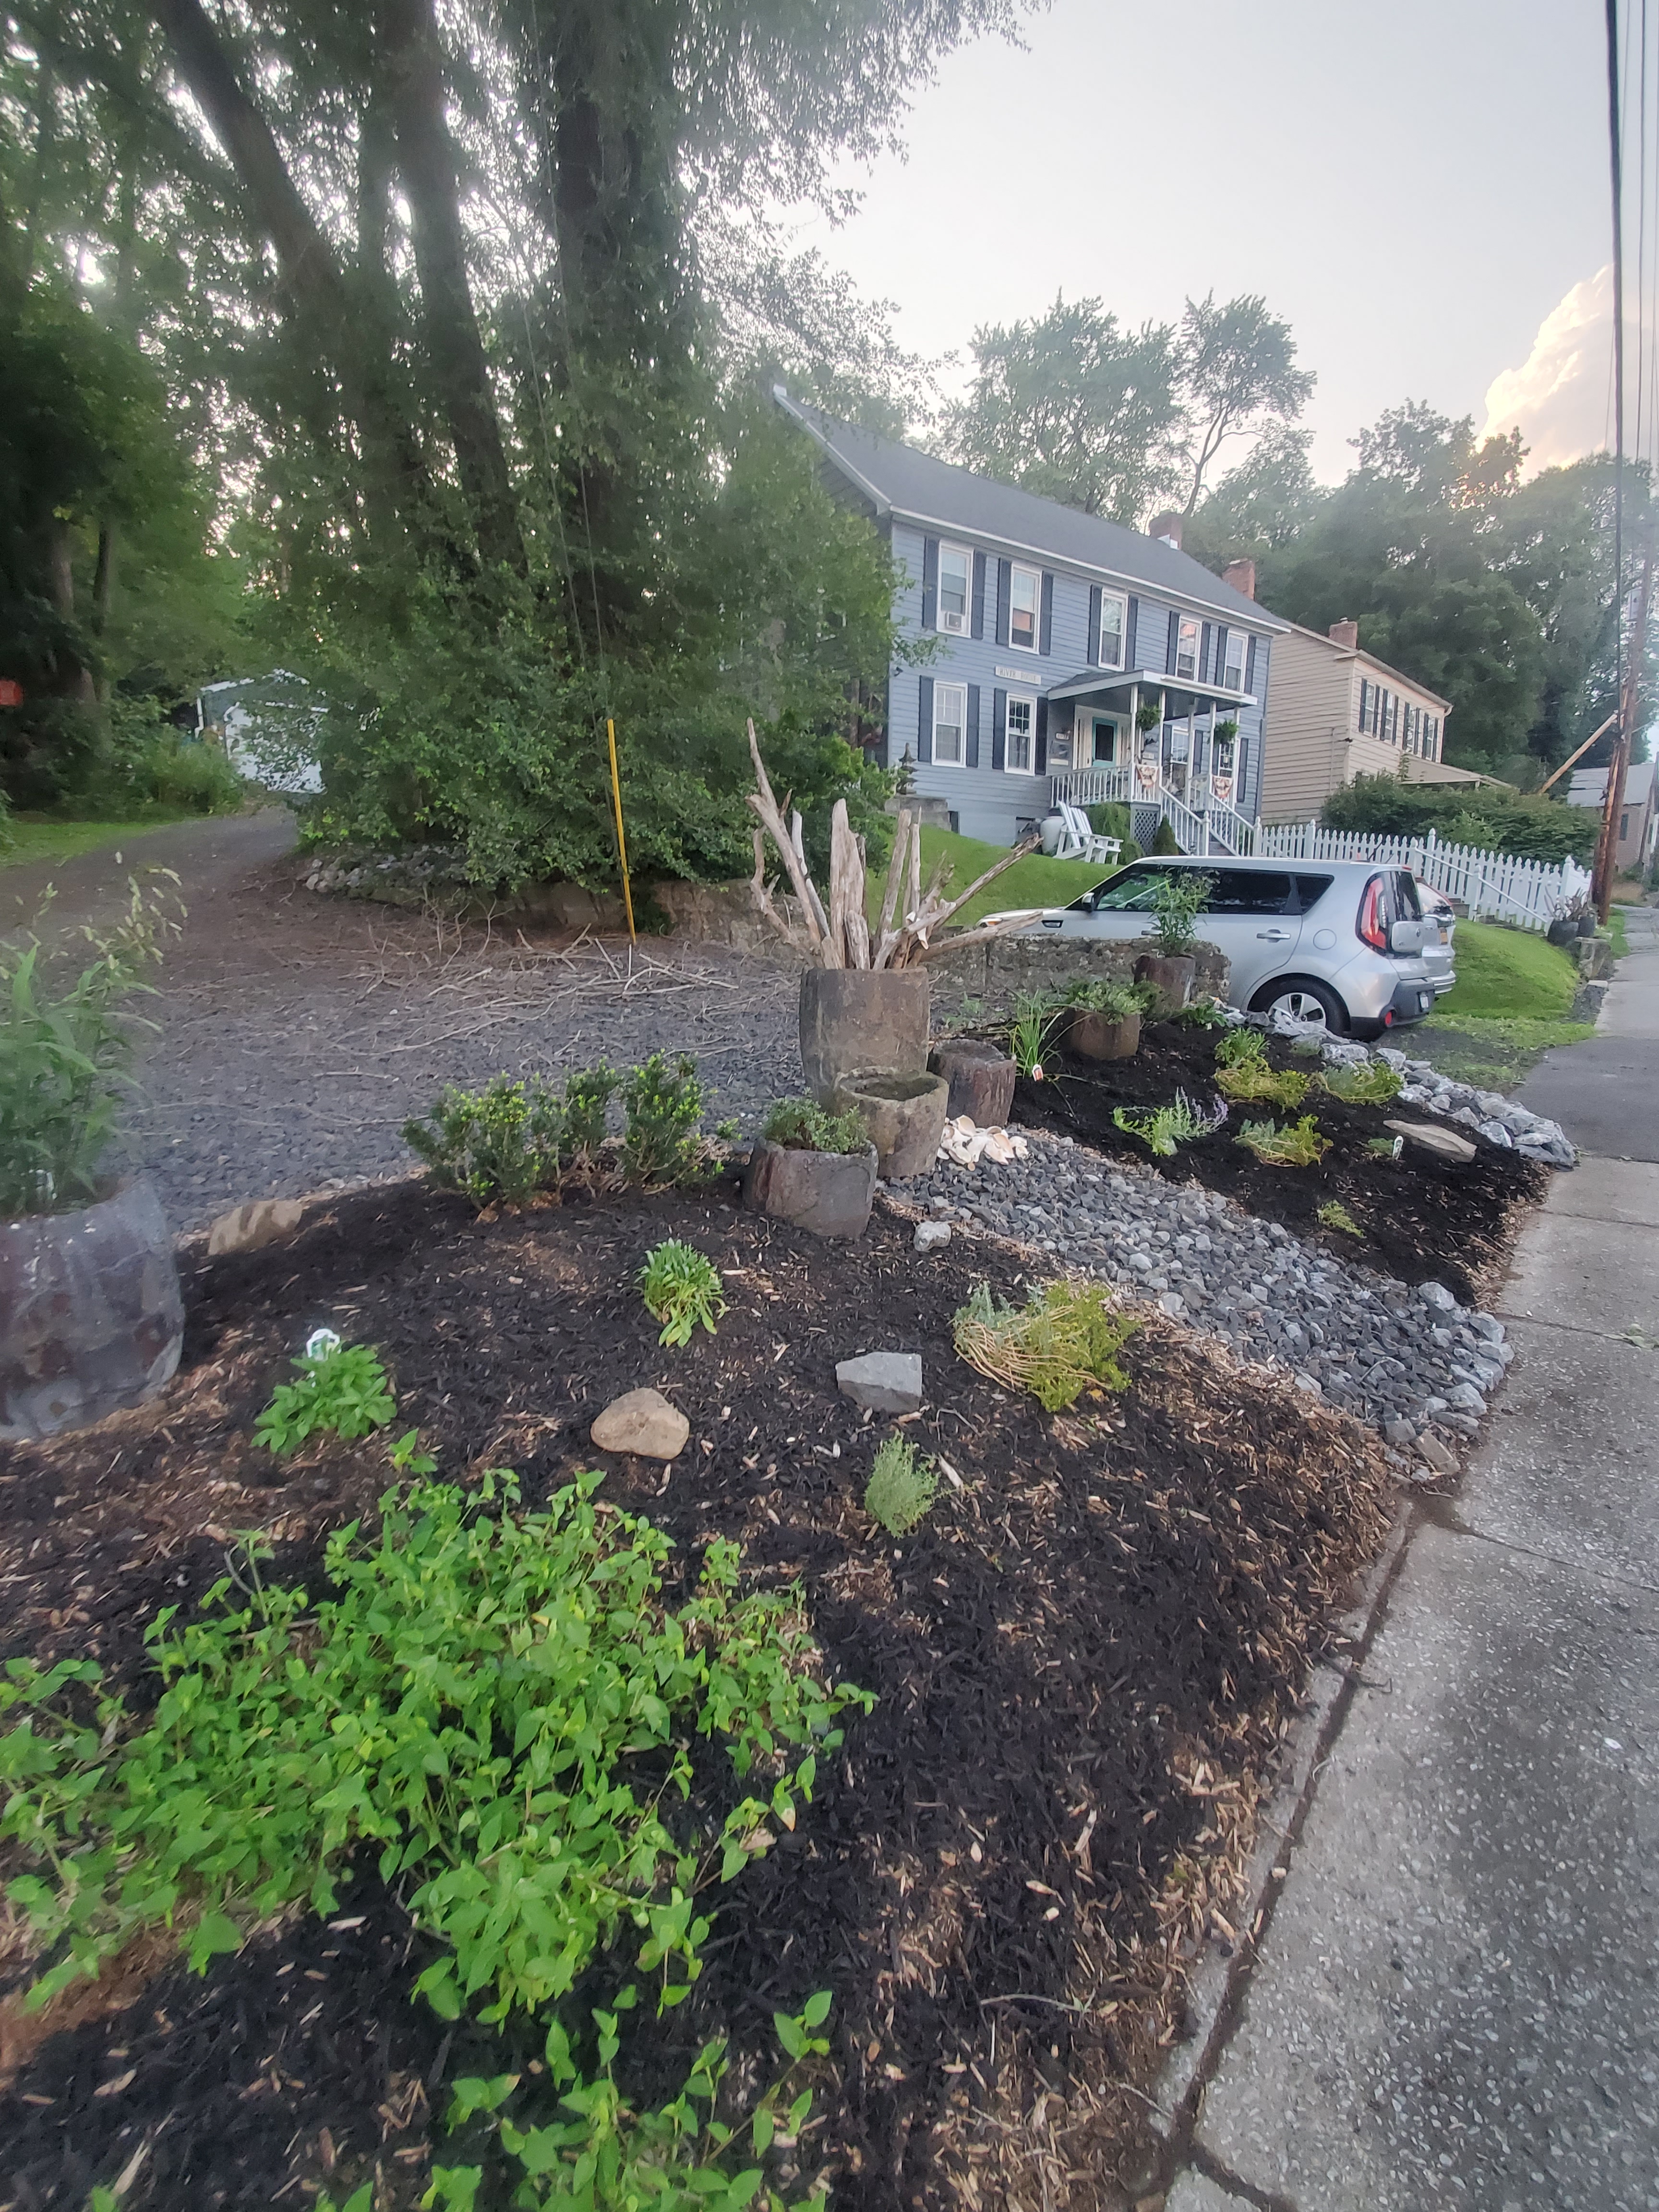
After

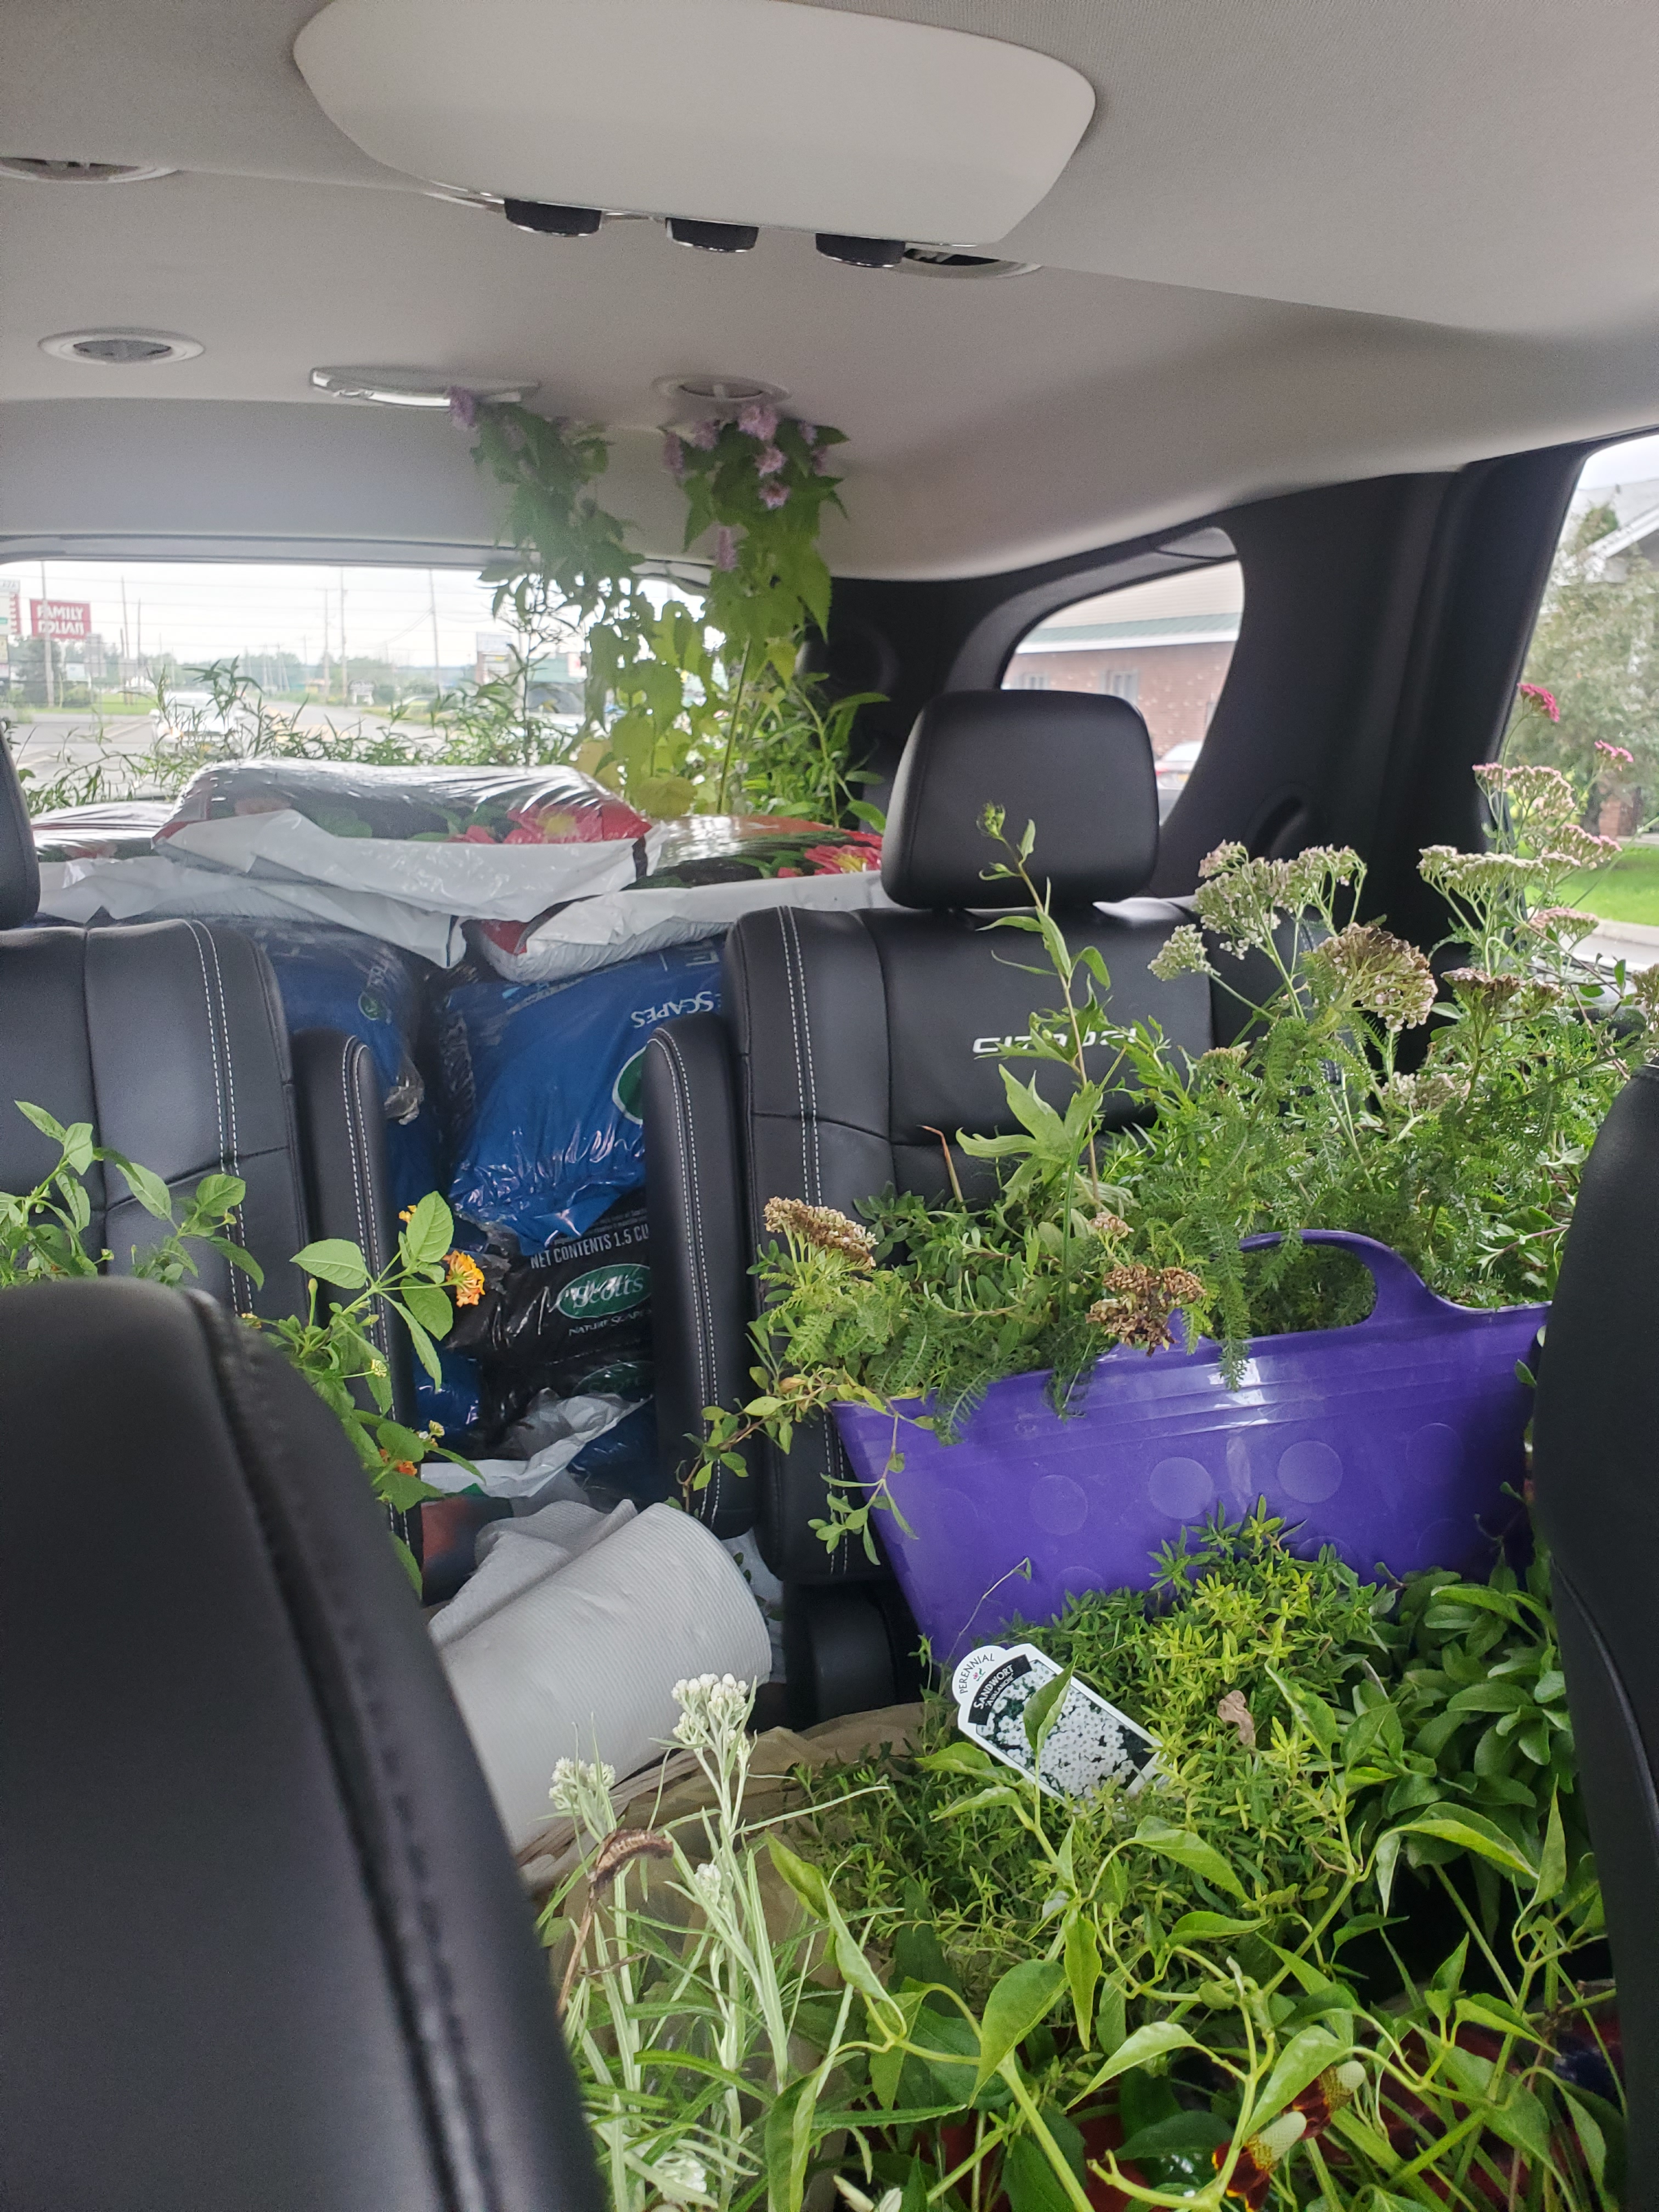
Our shopping adventures took us to Lowe’s Garden Center in Catskill and Black Horse Farm in Coxsackie where we made the most of their end of season perennial sales!

Pro-tip: When buying plants, make use of trugs (the purple and orange plastic containers). They make transporting plants simple and result in limited clean-up.

Plant Shopping

All in all, this was a fun, relaxing way to spend our Saturday night and Sunday afternoon as a family. Our Instant Garden was a simple and pretty affordable way to add curb appeal to the house and create something that will bloom and provide beauty year after year.

Our costs for this project were lower than what is presented below, because some of the perennials bought were for other projects and two trugs full for my grandmother. Here is a breakdown of the materials used and costs (including taxes of course):

12 Bags of Mulch (plus three bags of top soil for another project) from Lowes – $24 (Since some of the Mulch bags can holes in them the Cashier gave everything to us for 50% off so each bag of Mulch costed $1.25.)

Landscaping Paper – Free (Used leftover paper from last year)

Perennials from Black Horse Farm 12 for $36 – $236

Perennials from Lowes 50% Off – $79

Bricks and Rocks – Free (Unearthed from our digging and recycled to highlight the history and character of the house)

Total Cost: $339 Total Time Spent: 5 Hours

Repurposing Unused Windows for a One-of-a-Kind DIY Greenhouse

Spring 2020

The quarantine meant we had time for home improvements; first off was backyard projects! Since we have been home for a considerable amount of time we decided that we would put some love into our yard (especially since there were no vacations in our foreseeable future). This project was completed in April, but we are just getting around to sharing!

The inspiration for this project came from a phenomenal artist we met in Troy, NY last summer. She created and built a similar greenhouse and we absolutely fell in love.

So next came the task of where to build it and gathering materials. After reaching out to our wonderful family and friends on Facebook, we were given a handful of windows from our great friend and neighbor, Kevin. Next, we bought some industrial windows from an old factory in Cohoes to finish off the sides. For years, we wanted to build a greenhouse complete with a stained glass window, but sadly they are very expensive. After finishing the sides of the greenhouse, we got a call from our friend Kevin who said he had a few extra windows for us to look at. To our amazement, he had a beautiful stained glass window and door that fit perfectly in the front of the greenhouse.

Other than the time commitment, the only costs for this project were the 2×4’s used to connect the windows/ walls, the sheet of corrugated steel for the built-in workbench, and the grey patio pavers that were used as the foundation.

*When considering a project like this reach out to friends and family (social media is a plus here) to see if they have any materials that they no longer want. If all else fails, there are some great restoration places to search for unique and historical pieces.

Take a look at the before pictures and progression of the greenhouse below!

Before

Both Rick and Elisabeth spent a weekend in early April building the foundation and putting up the windows. Elisabeth held the boards and windows in place as Rick put everything together. Rick also built a nice potting bench along the far wall to use for planting. After the walls were up, clear plastic roofing was used for the top. Although a tedious project, it was a fun project that is a beautiful addition to our backyard oasis!

This was a really fun project and turned out to be a major success! Check out the after pictures from our weekend task of building a greenhouse. Stay tuned for other backyard projects!

After

Turning the Unfinished Attic Into an Art Studio and Meditation Area

Rick just completed remodeling one-third of the attic! The attic is a great space except for the extremely steep stairs! We have wonderful views of the river from the two north-facing windows.

We now have an art studio area and a yoga/meditation area.

We used materials that were easy to transport up the steep stairs and those that were budget-friendly.

As the floor was uneven, we used the rubber interlocking mats for flooring. The walls are tin roofing and shiplap.  He used old windows that will allow the unfinished area some light.

We used furniture that we had stored up there and are slowly going through each item in the attic.  Keep, throw, or donate. What a job!!

Looking forward to our new attic hideaway!

After

Before

Tackling the Attic (aka Elisabeth’s Collection of Stuff)

The past 2 weekends we started going through some of the containers. I have saved everything!

Last weekend, we sorted her baby items I am keeping.

This weekend we focused on most of the items Elisabeth has collected for her future home. We also went through everything she brought home from her last apartment.

Happy to say we have 4 empty containers, a pile for Goodwill, items for our antique booth and garbage

Lots more to do but feels great to start to clean out the attic and the shed!

An Affordable Solution to the Dreaded Dirt Basement

Our 1839 home has a dirt basement. Finally, after opening up the basement stairs, it was time to tackle the basement once and for all.

When we purchased the house, there was a toilet on top of the stairs to the basement. The old owners tried to make this house into 3 apartments. Two weeks ago, Rick opened up the stairs again and added a door. We cleaned out what we had been using as a closet and made it into the interior entrance to the basement. As we have a second freezer and refrigerator this was needed.

I got sick of tracking dirt upstairs. While concrete would be the best, we would not be able to afford it. Also, we have 600 gallons of water storage we would be unable to move. Stone was another option, but getting the stone to the basement would be impossible without doing it all by hand. I saw these exercise fatigue interlocking mats online. I ordered a couple packs. We loved how they looked. I ordered 7 more packs. Home Depot messed up the order and gave us multicolored children’s play mats. We were able to keep them for free. Not sure if they will work with moisture. For the $56.00 willing to give them a try.

Rick decided to organize his items so he could do a workbench in the basement. We ordered a couple shelves online as we were not going to a store.

I will also have a work area in front of the window at some point. We bring all the plants in for the winter.

The project cost under $100. Well worth the cost. Still a dirt basement but….

Before

After

Sunday Morning Breakfast

Every Sunday and usually Saturday I make us a nice breakfast. Coming up with ideas can be challenging. Today, I decided to make gluten free waffles topped with cherries, walnuts and Vermont maple syrup. We had picked the cherries last summer. I sauted them with butter, honey and cinnamon. I had sauted the walnuts earlier in the week with olive oil and honey. According to Rick and Elisabeth, the best waffles yet!

$50 Guest Bedroom Remodel

After almost 6 years, it was time to do a cheap remodel on the small guest bedroom. We ordered a quart of paint online at Home Depot ($14.00). Yes, you can order paint online for at-home delivery. We also ordered 2 white comforters from Target ($18.00 each). We painted one accent wall navy blue. In completing the project, we decided to remove the headboards of both twin beds which in turn has made the room seem bigger.

To add the final touch, we added two vintage floral prints above each of the beds. Our plan is to paint the small nightstand with Annie Sloane chalk paint soon.

The total project cost $50.

After

Before

Before

Bringing Color and Order to Our Den/ Library

The last couple of weekends, Elisabeth and I have been focused on reorganizing the very small den. This home is half the size of our old colonial home in Vermont. We had two dens in Vermont. Here, we have one very small den which doubles as a library.

Last weekend we reorganized all the knick knacks, photos, and hanging pictures. I ordered a new smaller love seat which should arrive next week. I also ordered 24 black photo boxes from Michael’s online (at a steal for 12 for 24.00).

We have spent the past two days, organizing all photos and books in the den. Great project for the blistery cold days and for staying at home while our puppy is recuperating from being spayed.

What a job, the photos were. So great to have them organized by date in photo boxes.

Next came the bookcases. We have tons of books, especially garden books and cookbooks. Decided to color code the books by type (at least the best we could).

Looking forward to sitting and relaxing in the organized den. While a larger den would be better, we are making the most of this small space. The total of the project including a new couch, storage containers, floor lamp, and storage cabinet was $560.00 and included repurposed furniture from the attic.

Next week, the pantry!

Crab Stuffed Mushrooms

processed_20200524_170341.jpg

Crab Stuffed Mushrooms

These mouthwatering crab stuffed mushrooms add a flair to traditional appetizers or make a nice side dish.

Ingredients :

Cooking Spray for Pan

1 Package of Baby Mushrooms

3 Cloves of Garlic, Chopped

1/4 Cup of Spicy Panko (Or Whatever Panko You Prefer)

1 Jar of Fresh Cooked Crab Meat (We Used Leftover Meat from Crab Legs)

1/4 Cup of Freshly Granted Parmesan Cheese

Fresh Parsley and Basil

Spices (Italian Seasoning, Red Pepper, Salt, Pepper)

Optional: Fresh Chives

Instructions:

  1. Preheat the oven to 400 degrees. Grease a baking dish with cooking spray.
  2. Wash the mushrooms, remove the stems, and place the stems aside. Place mushroom caps in the baking pan.
  3. In a large bowl, mix the mushroom stems, garlic, panko, crab meat, cheese, spices, and chives. Chop all the ingredients in the bowl until diced.
  4. Fill the mushroom caps with the filling and sprinkle with more parmesan cheese.
  5. Bake until the mushrooms are soft and tops are golden, 25-40 minutes.

* Garnish with parsley or a balsamic glaze to serve.

No-Fuss Dinners When the Winter Chills Zap Your Energy

Some days(weeks) you just don’t feel like cooking! As much as I enjoy cooking, by the end of some days,I am exhausted and no idea what to cook.  This has been one of those weeks. Right now all of us are dealing with stress we can not control, COVID and political unrest! Where and when do I order groceries? Is it safe to go to a local grocery store with increase in cases?

For all of us in the Northeast, cold, dark, dreary days with no snow that zaps your energy!

Like all of you we must eat and have leftovers for lunch.

This week it has been last minute dinner decisions. Thankful for a freezer full of food.

Monday – Leftover chicken thighs. Couscous mixed dates and walnuts.

Tuesday – Baked ziti and hot sausage links with frozen stir fry mix of peppers and onions. The ziti is such an easy recipe! I do not precook noodles. Mix box of noodles, jar of sauce, jar of water, italian seasoning, container cottage cheese optional, shredded mozzarella. Mix it all together. I add a little more mozzarella to the top. Cover tightly with foil, bake for about 45 minutes at 375! There are actual recipes online!

Wednesday – Unstuffed Cabbage Rolls using ground venison.

Thursday – Chicken wings in airfyer and salad with pears and blue cheese

Friday- Homemade pizza with mushrooms, peppers and pesto. Pizza dough in the bread maker.

Saturday – Since going out isn’t safe, we make a fun meal once a week. Croissants topped with pork, peppers, cheddar cheese,aoli and homemade onion rings. Served with homemade sweet potatoe fries and roasted broccoli.

Leftover chicken, couscous and vegetables
Unstuffed cabbage rolls
Pizzas
No bake granola bars
Saturday Fun Dinner